Use of Automated External Defibrillator (AED) – A Step By Step Guide
Messy electrical activity in the main pumping chambers of the heart leads to ventricular fibrillation, which is a primary reason for cardiac arrest. Defibrillation is the process of delivering an electric shock to the victim’s heart through his or her chest wall, which then treats the initial problem of ventricular fibrillation. The regulated electric shock reorganizes the electrical activity in the heart, allowing normal activity to resume.
The automated external defibrillator (AED) is a device that can detect ventricular fibrillation and other dysrhythmias, delivering electric shock appropriately. The AED has become a regular fixture in many public establishments. The AED is an automated device with room for few to no mistakes. It can be safely used by any individual. In cardiac events where the victim observably collapses suddenly, the usual cause is ventricular fibrillation and a defibrillator should be used to assess the person’s cardiac rhythm immediately.
In line with the concept of team multitasking, one of the rescuers should facilitate the steps so that all areas will be covered, including the execution of chest compressions and AED preparation. Though there may be many brands of AED, all models are used in the same way.
Before using the device, it is necessary to be in a safe place. Water is a hazardous element when combined with electricity, so make sure that the patient is not wet or in close proximity to any body of water before using the AED. It is safe to use this device when the person is lying in the snow.
Devices such as pacemakers are easily detectable by the bulging over the chest. Place the defibrillator pads as accurately as possible without being directly over the device. If your patient has medication patches, remove the patch and wipe away the residue, then apply the AED pad
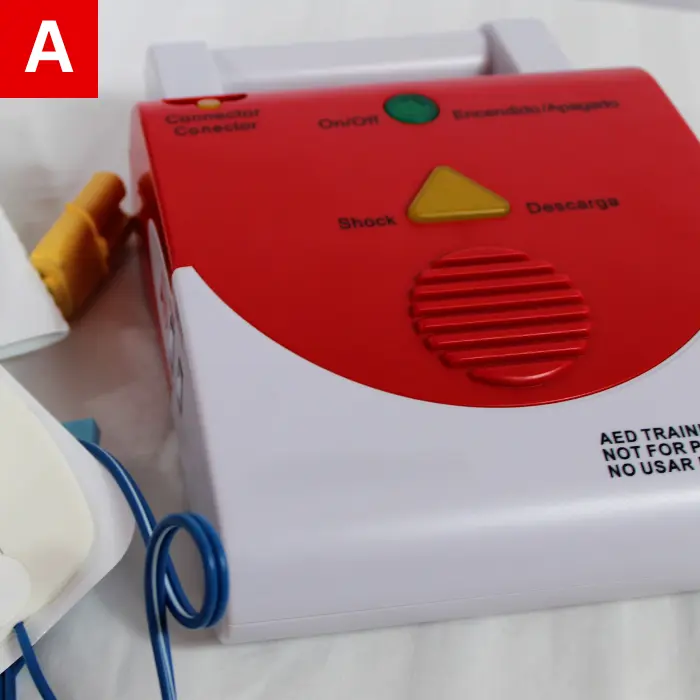
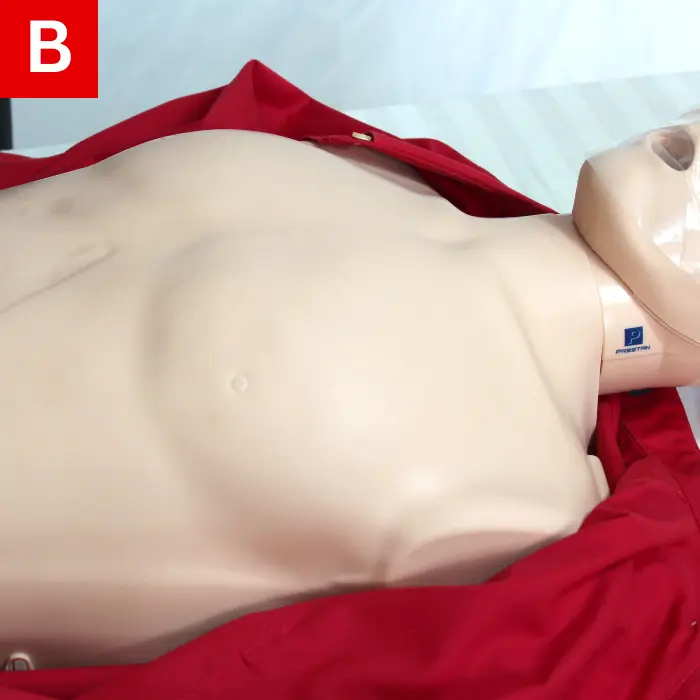
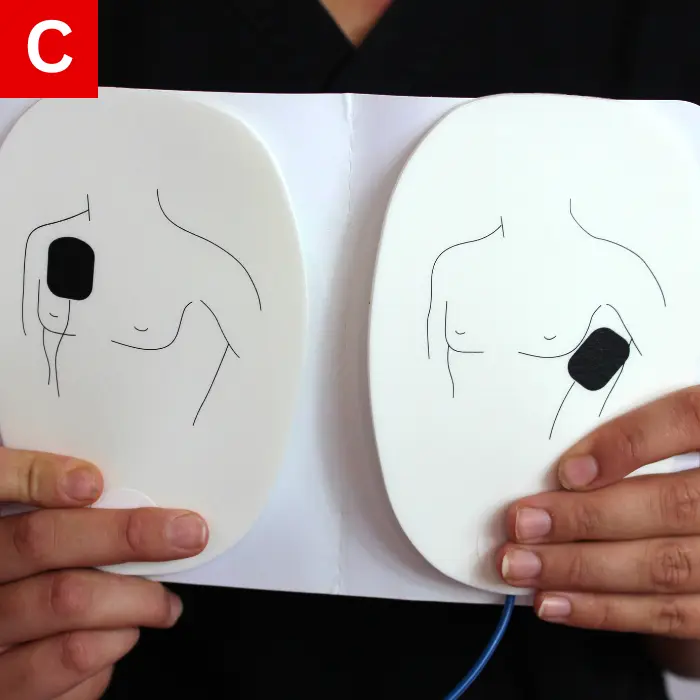
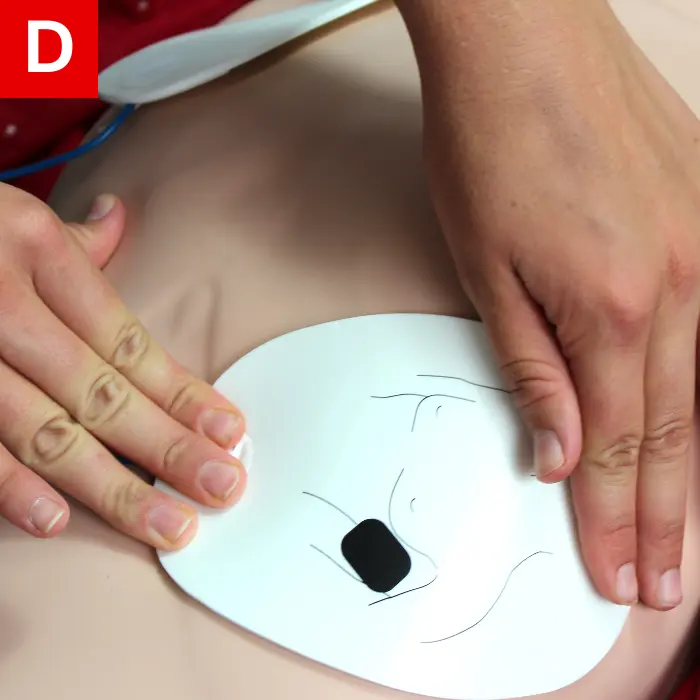
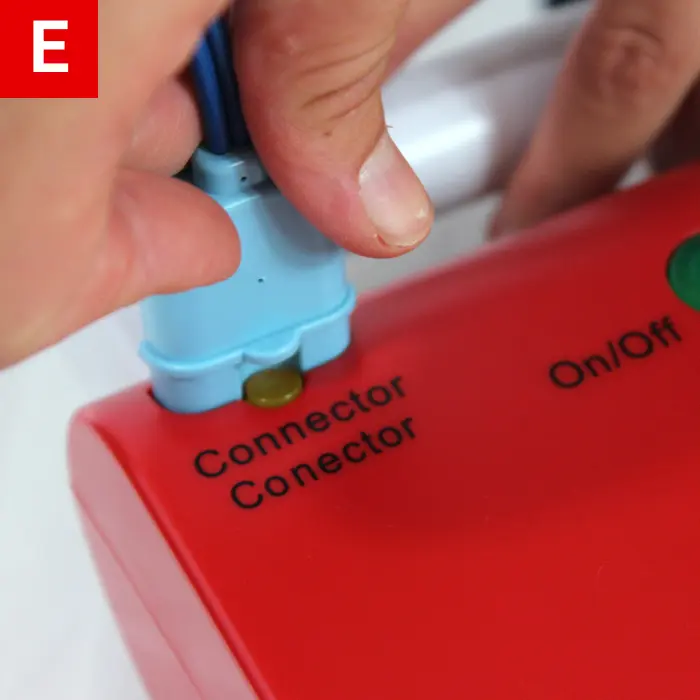
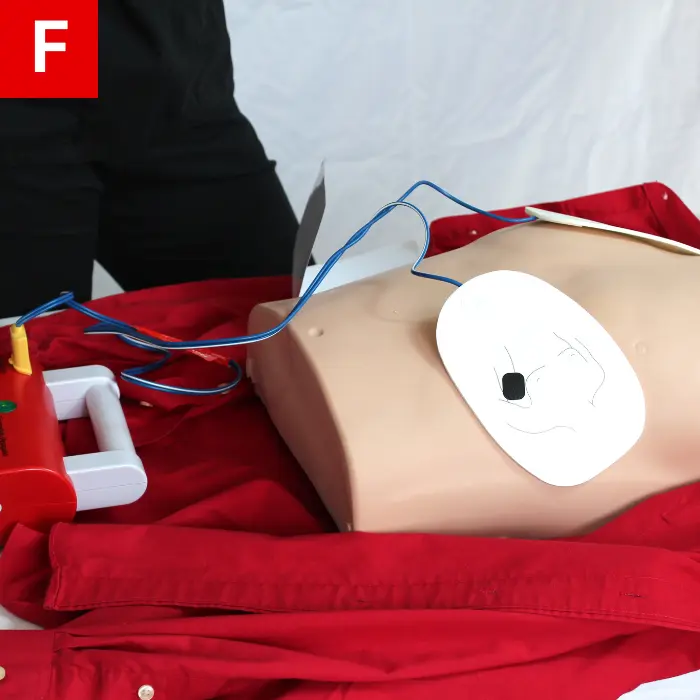
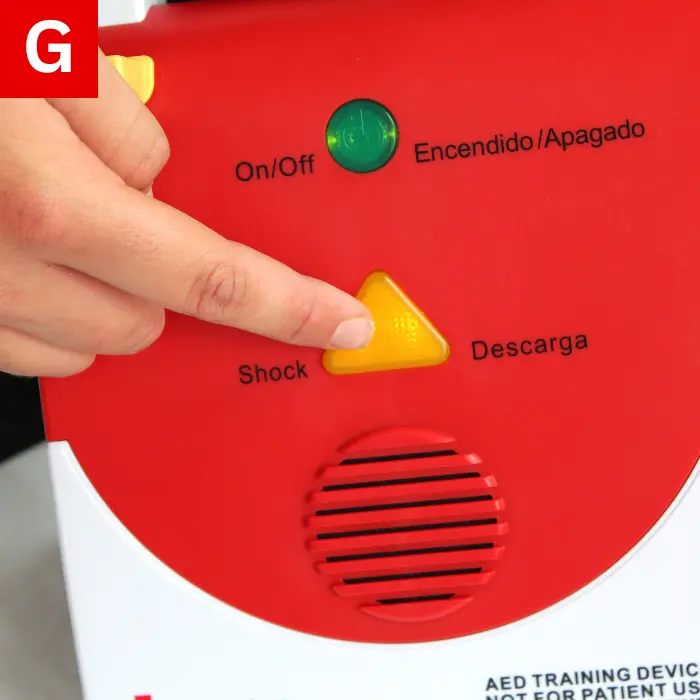

Figure 8
AED Steps
- Get the AED (Figure 8a).
- Retrieve it from the case.
- Turn on the device.
- Keep the person’s chest exposed (Figure 8b).
- Dry the chest if necessary.
- Remove existing medication patches.
- Peel off AED pads (Figure 8c).
- Remove back covering.
- Watch out for a pacemaker or internal defibrillator.
- Place the pads onto strategic areas (Figure 8d).
- Place one pad on the upper right chest above the breast.
- Place the second pad on the lower left chest below the armpit.
- Check if the wires are connected to the AED box (Figure 8e).
- Keep a good distance between you and the person being treated (Figure 8f).
- Stop CPR.
- Maintain distance from the person and make sure no one is touching any part of the victim.
- Allow AED to analyze the rhythm of the person’s heart.
- If the device reads “Check Electrodes,” proceed with the following steps:
- Check if the electrodes are in full contact with the body.
- If the chest is hairy, peel off the pad and replace it with a new one.
- You’ll know it’s time to deliver the shocks when AED reads “Shock.” Then, follow these steps:
- Prohibit anyone from touching the person.
- Press and hold the “shock” button until AED delivers the shock (Figure 8g).
- Continue with CPR for two minutes starting with chest compressions (Figure 8h).
- Repeat steps 1 to 10.
