Infant CPR and Choking
Playlist includes 7 training videos
Actual heart problems are less common than breathing difficulties in infants. Because of this, before considering going to get additional help, it is essential to quickly start CPR and to perform two minutes of CPR immediately. Each set of CPR consists of 30 compressions and two breaths for one provider or 15 compressions and two breaths for two providers.
If available, have a second rescuer call 911/EMS and find an AED. Upon their return, work as a team and have them follow the AED prompts, apply the pads, and help you with CPR.
Provide CPR if the infant is unresponsive and having trouble breathing.
Do the following when giving CPR to an infant:
- Assess the safety of the scene and make sure the infant is safe.
- Tap the infant and shout to determine if the infant is unresponsive.
- Yell for help. if possible, get a second person to get an AED and call 911/EMS.
- Check the infant’s breathing.
- Give two minutes of 30 compressions and two breaths for one provider or 15 compressions and two breaths for two providers if the infant is not responding and is having trouble breathing.
- If a second person has not already done so, call 911/EMS.
- Resume CPR and give compressions and breaths.
Infant CPR (0 to 12 Months)
CPR is similar in children and in infants. Infants who do not blink, speak, move, make a sound, or make any reaction to your efforts to rouse them are considered “unresponsive” or “not responding,” thus requiring CPR.
Only use the “hands-only” CPR if you are an untrained rescuer. This means no breaths and only continuous compressions.
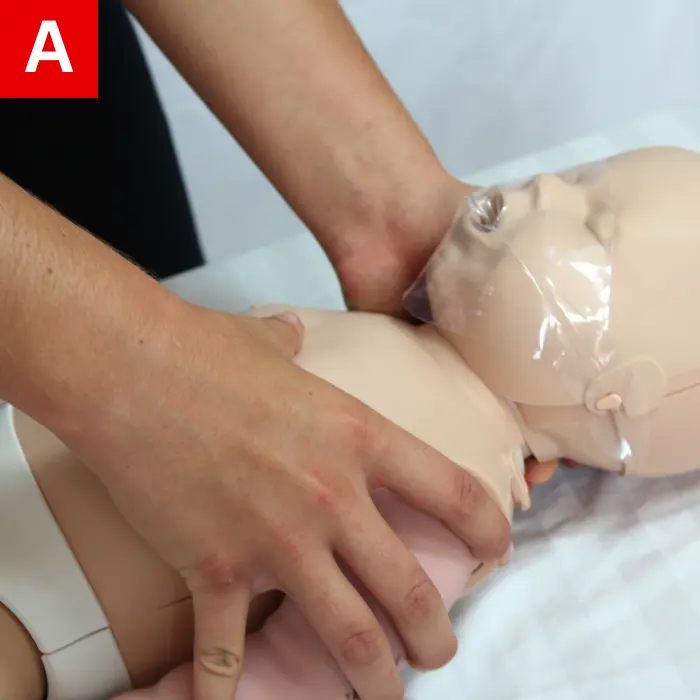

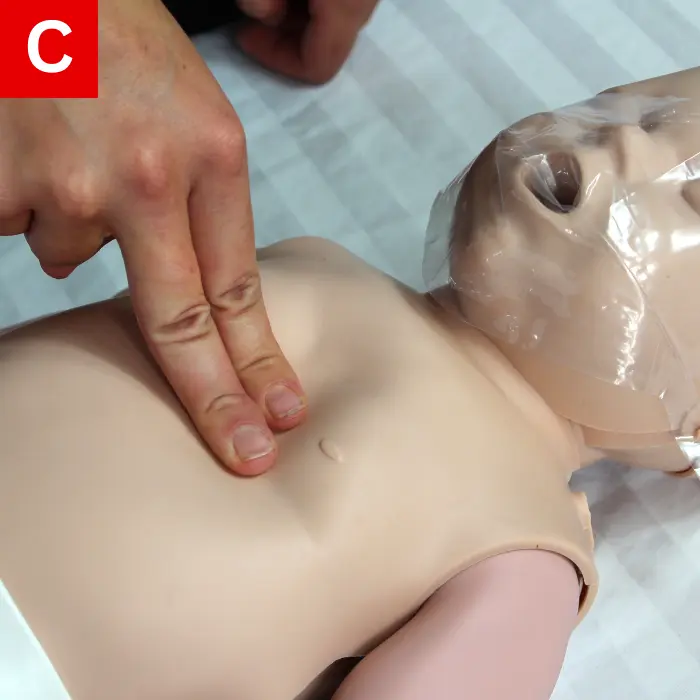
Figure 25
Compressions
An infant receiving CPR must be treated much like a child or adult receiving CPR; you must push hard and fast. CPR can be made easier by positioning the infant on a hard and firm surface.
Do the following to perform CPR on an infant:
- Find a firm, flat surface to position the infant on his or her back (Figure 25a).
- Bulky clothing at the neck and chest area must be opened or removed (Figure 25b).
- On the breastbone right below the nipple line, place two fingers of one hand (Figure 25c).
- For at least 1.5 inches (4 cm), push straight down. Deliver compressions at a rate of 100 to 120 beats per minute.
- After each compression, allow the chest to fully recoil.
As CPR can become tiring, change roles with another person (if available) every two minutes. The pause between compressions must be minimized.
Giving Breaths
The infant can be helped with breaths during CPR. Cardiac arrest in children can be a result of severe breathing problems from a respiratory illness. It is important for infants receiving CPR to be given breaths and to have chest compressions administered. The child’s chest will rise after a successful breath.
To open the person’s airway, do the following:
- Place a hand on their forehead.
- On the bony part of their chin, place your fingers.
- Lift their chin and tilt their head back gently.
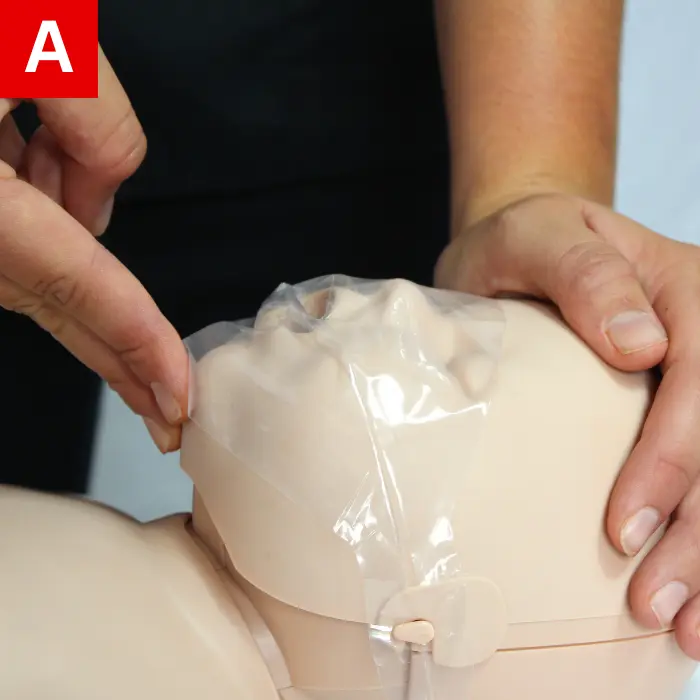
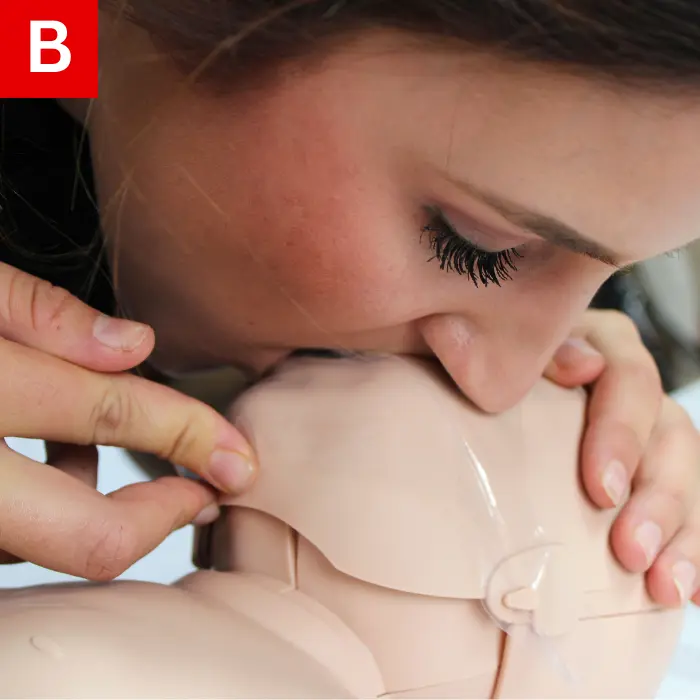
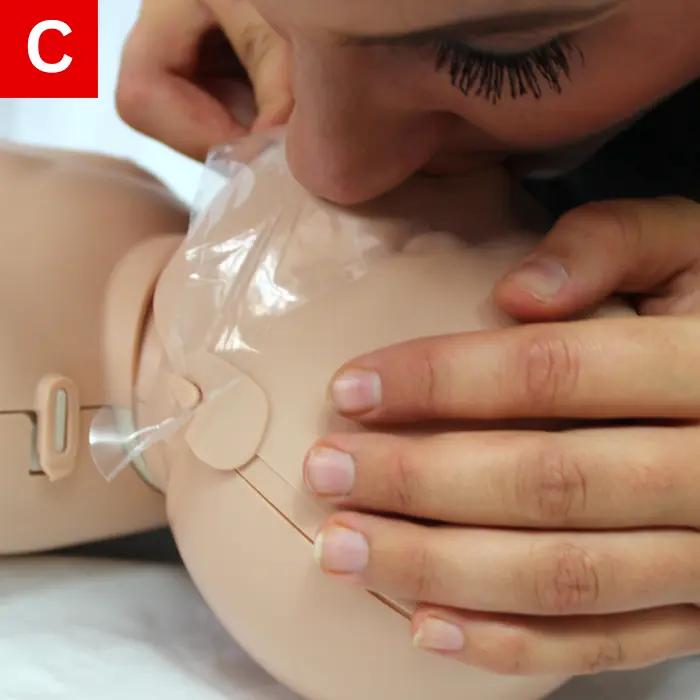
Figure 26
Be careful not to block the airway by tilting the head too far back. You may also block the airway if you press the soft part under the chin.
Do the following to give breaths:
- Pinch the infant’s nose shut and hold their airway open (Figure 26a).
- Breathe deeply, then secure your mouth around the infant’s mouth and nose (Figure 26b).
- Watch the chest rise as you blow for one second (Figure 26c). To inflate an infant’s lungs, you need very little force or volume. The infant’s lungs will be damaged if you blow too hard or too much, so you only need to perform a gentle exhale for a tiny puff of air.
- Repeat with a second breath.
Use the following method for rescue breathing if you are unable to cover both the infant’s mouth and nose entirely with your mouth:
- Open the infant’s airway using the head-tilt/chin-lift maneuver.
- Pinch the infant’s nose closed, then create a seal using your lips to surround the infant’s mouth.
Let the head go back to a normal position and then lift the chin and tilt the head again to re-open the airway if the chest does not rise after the first breath. While watching for the chest to rise, get a breath in. When giving breaths, do not interrupt compressions for longer than 10 seconds.
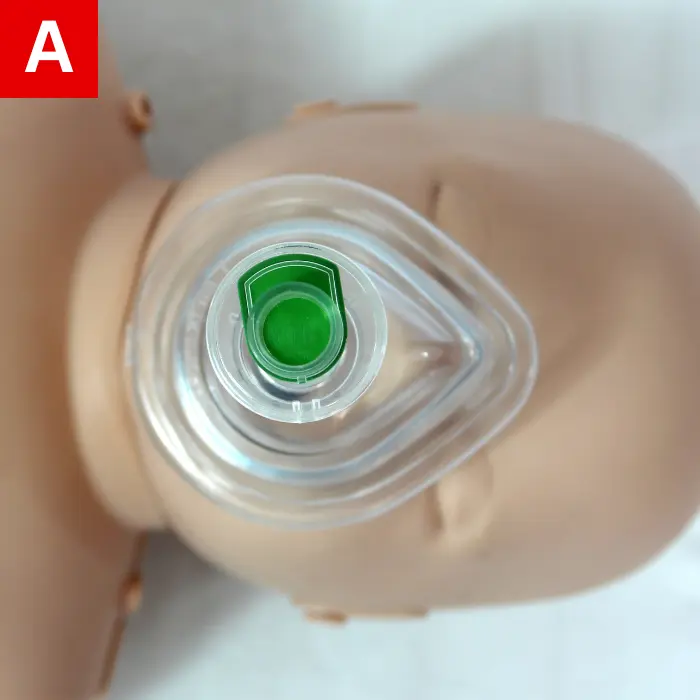
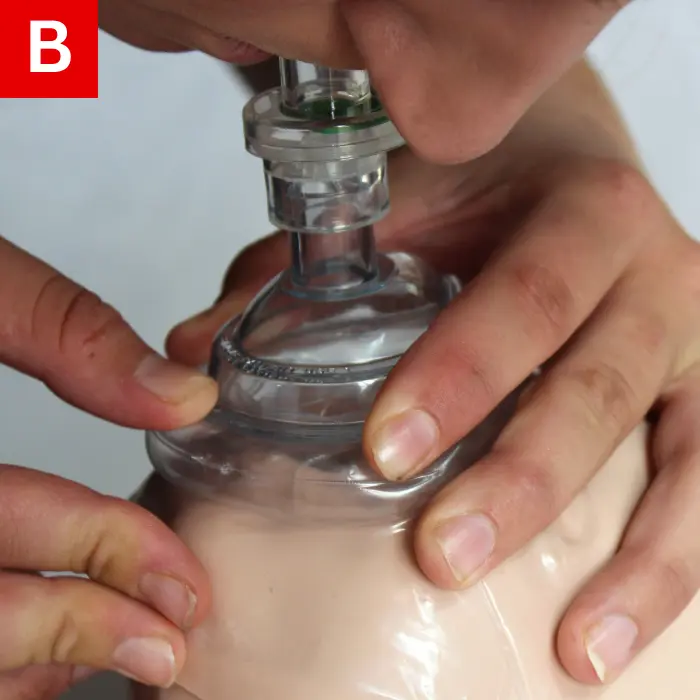
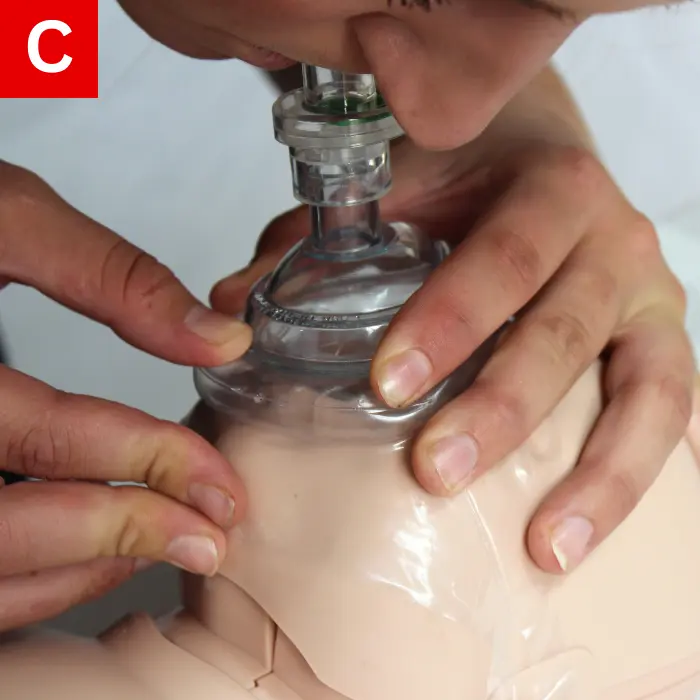
Figure 27
Mask Use
In general, including the act of giving breaths, CPR is safe. However, use a mask whenever it is available. Fit the mask over the infant’s nose and mouth. The pointed end of the mask should be fitted over the bridge of the infant’s nose. The mask must fit properly; efforts to deliver breaths will be ineffective if the mask is too large and no proper seal is achieved.
Do the following when using a mask to give breaths:
- Secure the mask over the infant’s nose and mouth (Figure 27a).
- Perform the head-tilt/chin-lift maneuver to open the airway.
- Ensure that there is a secure seal between the mask and the infant’s face (Figure 27b).
- Watch the chest rise as you give a breath for one second (Figure 27c).
Activating EMS (Calling 911)
- When approaching an infant, be certain that the scene is safe. It will make the situation much worse if you become disabled or injured.
- An infant is considered unresponsive if they do not move when you touch them; their body will be limp and they will not cry or make sounds. To determine if the infant is unresponsive, tap the infant, and talk loudly.
- Use a cell phone to call 911/EMS and yell for help; tell a second rescuer to call 911/EMS if no cell phone is readily available.
- Before calling 911/EMS, if you are alone, begin ten cycles of CPR (about two minutes).
Choking in Infants
When the airway is blocked and an object or food is stuck in the throat, this is known as choking. Infants are at an increased risk of choking because they often put small objects in their mouths. Quick action is required for severe choking. Back slaps and chest thrusts are actions you can immediately perform.
Determining whether choking is mild or severed is better understood in Table 3.
| Degree of Obstruction | Responsiveness | Rescuers Actions |
|---|---|---|
| Mild Obstruction |
|
|
| Severe Obstruction |
|
|
Table 3
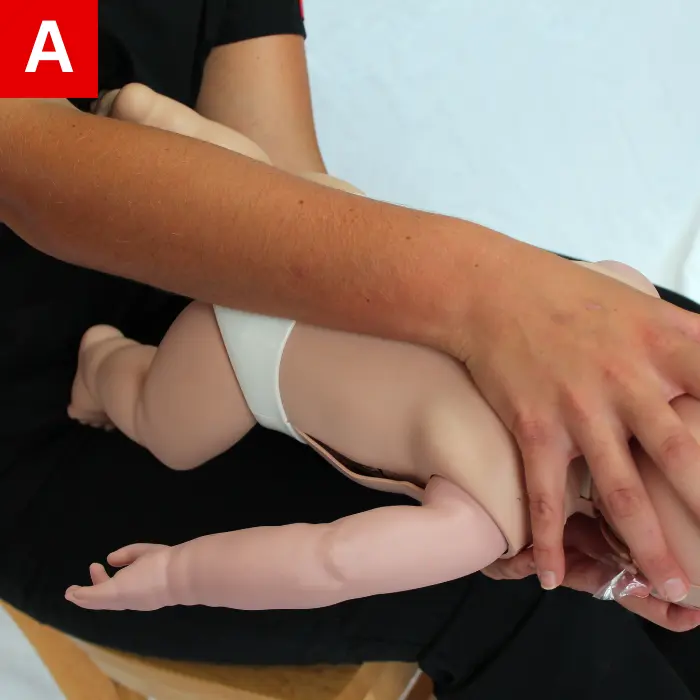
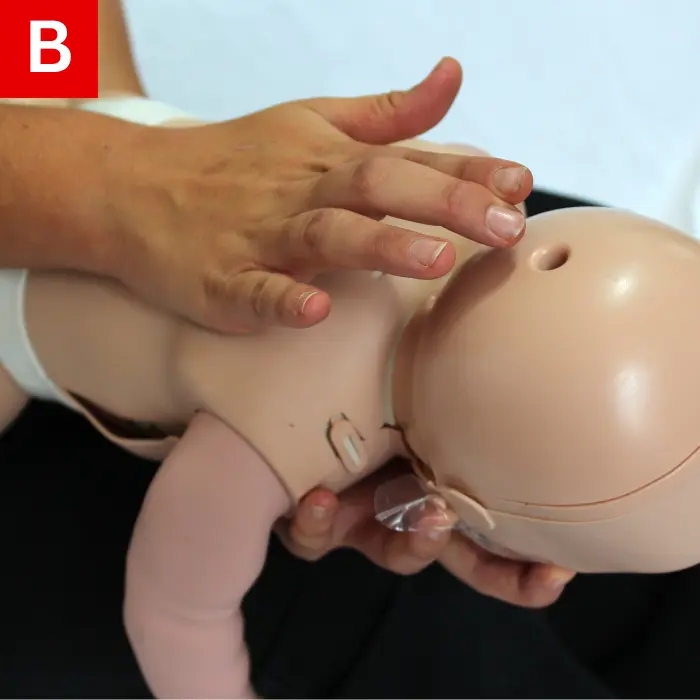
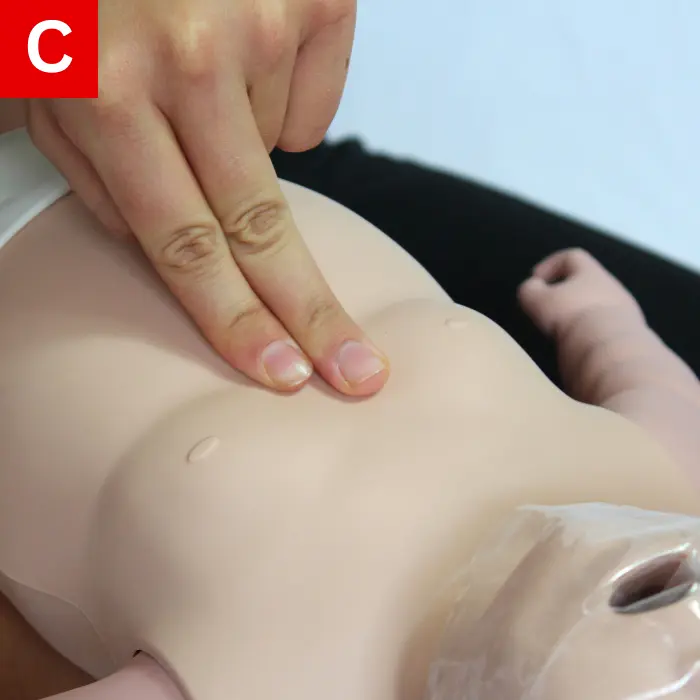
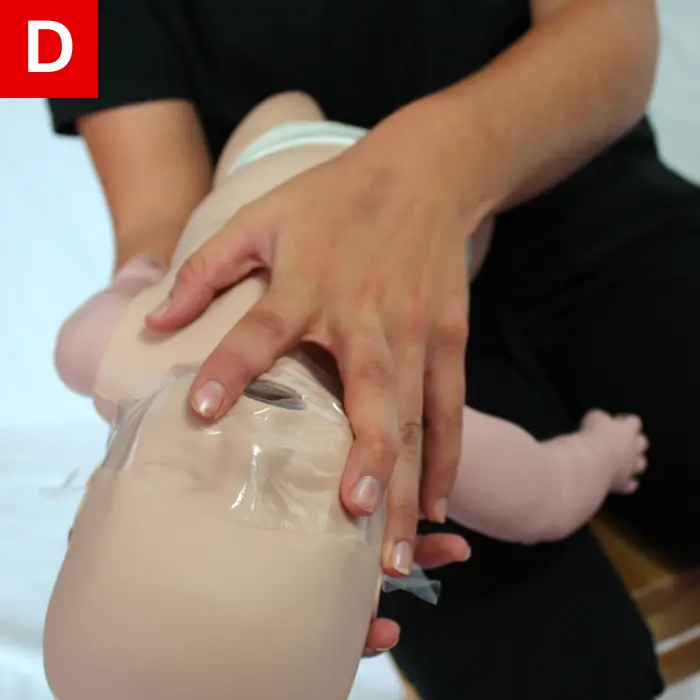
Figure 28
Relief of Choking
Infants who are choking require chest thrusts and back slaps.
When an infant is choking, do the following:
- The infant should be held in your lap.
- Position the infant resting on your forearm. The infant’s head should be lower than the chest, face down, with your thigh supporting your forearm (Figure 28a).
- Be sure to avoid putting pressure on the throat by supporting the infant’s head and neck with your hand.
- With the heel of your hand, give five back slaps between the infant’s shoulder blades (Figure 28b).
- Turn the infant face up using both hands and arms so that the infant is now resting on your other arm; your thigh should be holding this arm.
- Provide five quick chest thrusts using two fingers in the same spot as for infant CPR (Figure 28c).
- Repeat the process with the infant’s face down on your other forearm if the obstruction is not relieved (Figure 28d).
- Until the infant begins to breathe or becomes unresponsive, continue the process.
When performing back slaps and chest thrusts, keep the infant’s head lower than the rest of the body. Remove any foreign object that you may see in the infant’s mouth. However, you risk pushing the object deeper into the airway if you blindly sweep the infant’s mouth with your finger. Carefully observe their breathing by watching and feeling.
Yell for help and lay the infant down on a flat, firm surface if they stop responding. Begin CPR if there is no breathing. Open the airway and search for the foreign object after 30 compressions for one provider or 15 compressions for two. Attempt to remove it and, using two breaths, ventilate the infant.
The body will become limp and they will stop moving and squirming when the infant becomes unresponsive. Begin CPR right away with chest compressions and then breaths in cases such as these. If the infant does not respond or breathe, continue providing CPR until more help arrives.
